
# SSL Secure Server
This section covers certificate installation requirements, how to use the server's shared certificate, creating a self-signed certificate, and installing a purchased certificate. Any site that processes monetary transactions or takes in sensitive information (such as passwords) needs the protection of a SSL certificate.
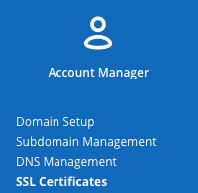
# Accessing SSL menu with DirectAdmin
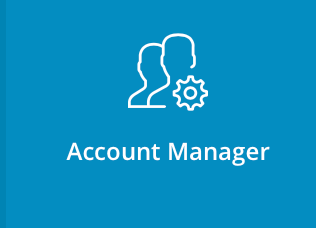
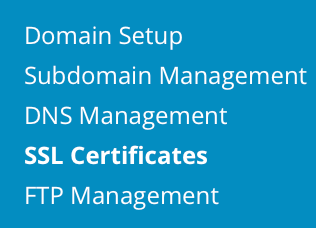
To create SSL certificate, or to paste pre-generated certificate key, access "Account Manager" from Control Panel, then click "SSL Certificates" link.
# Installing a Let's Encrypt Certificate
Probably easiest way to install secure, free and browsers trusted certificate for your site is Let's Encrpyt certificate, so we strongly recommend to use this method if you don't want to buy certificate from trusted authorities.
Note: You must enable let's encrpyt in DA to use it. If you don't see "Let's Encrpyt" section in SSL certificates menu, ask your admin to enable it. If you are admin, you can enable Let's Encrpyt by following this guide.open in new window
To enable Let's Encrypt, choose "Free & automatic certificate from Let's Encrypt" radius.
Enter Common name and E-mail.
Note: do not use "www" or "http(s)😕/" in common name section.
Choose which Certificate Entries you want to secure. You can select maximum of 20.
Note: Always select yourdomain.com and www.yourdomain.com entries.
Press "Save" button. That's it!
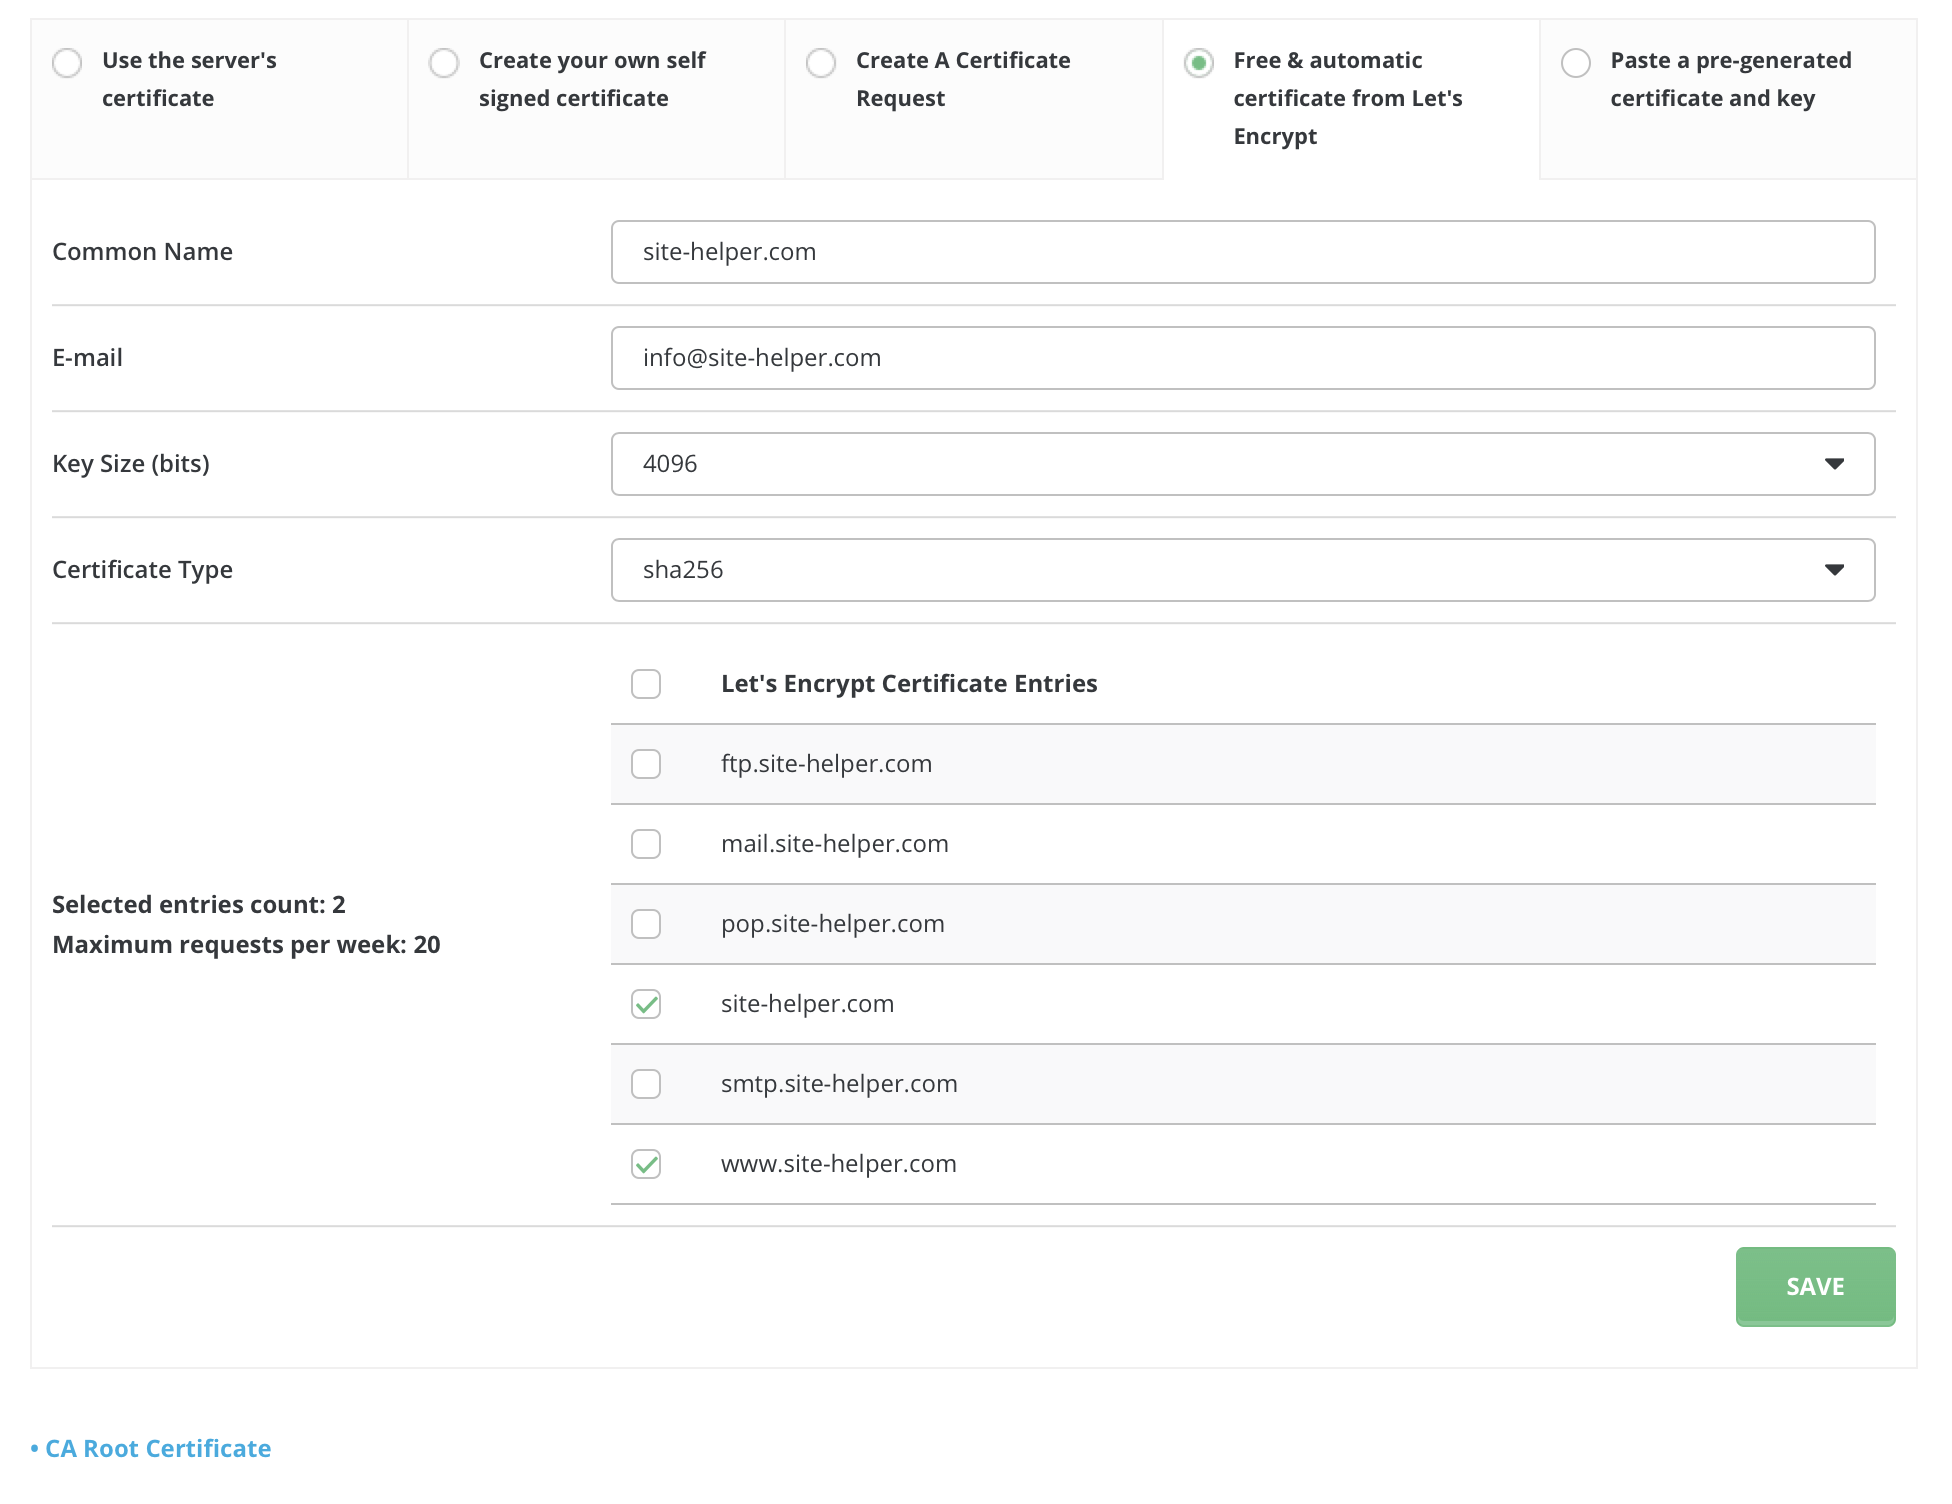
Note: Do not forget to setup private_html as explained here. Also, you may need to wait few minutes for users to see your site as secured.
# Installing a Purchased Certificate
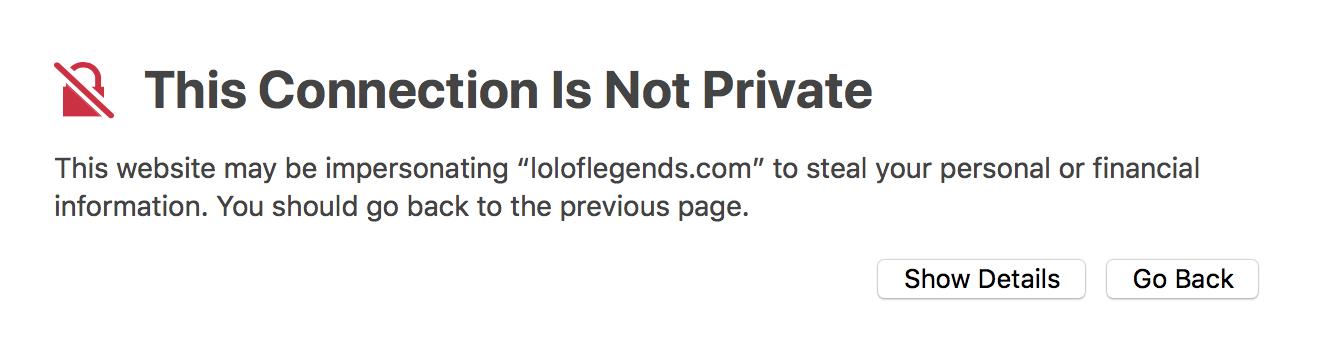
A purchased certificate is the best form of security. Because the certificate is both secure and trusted, visitors will not receive a warning popup window when viewing a secure page.
# Step 1: Generate a CSR
Make sure to click the radio button next to "Create A Certificate Request."
Then, enter the information about your company.
The "Common Name" refers to the address of your site that will go on the SSL certificate.
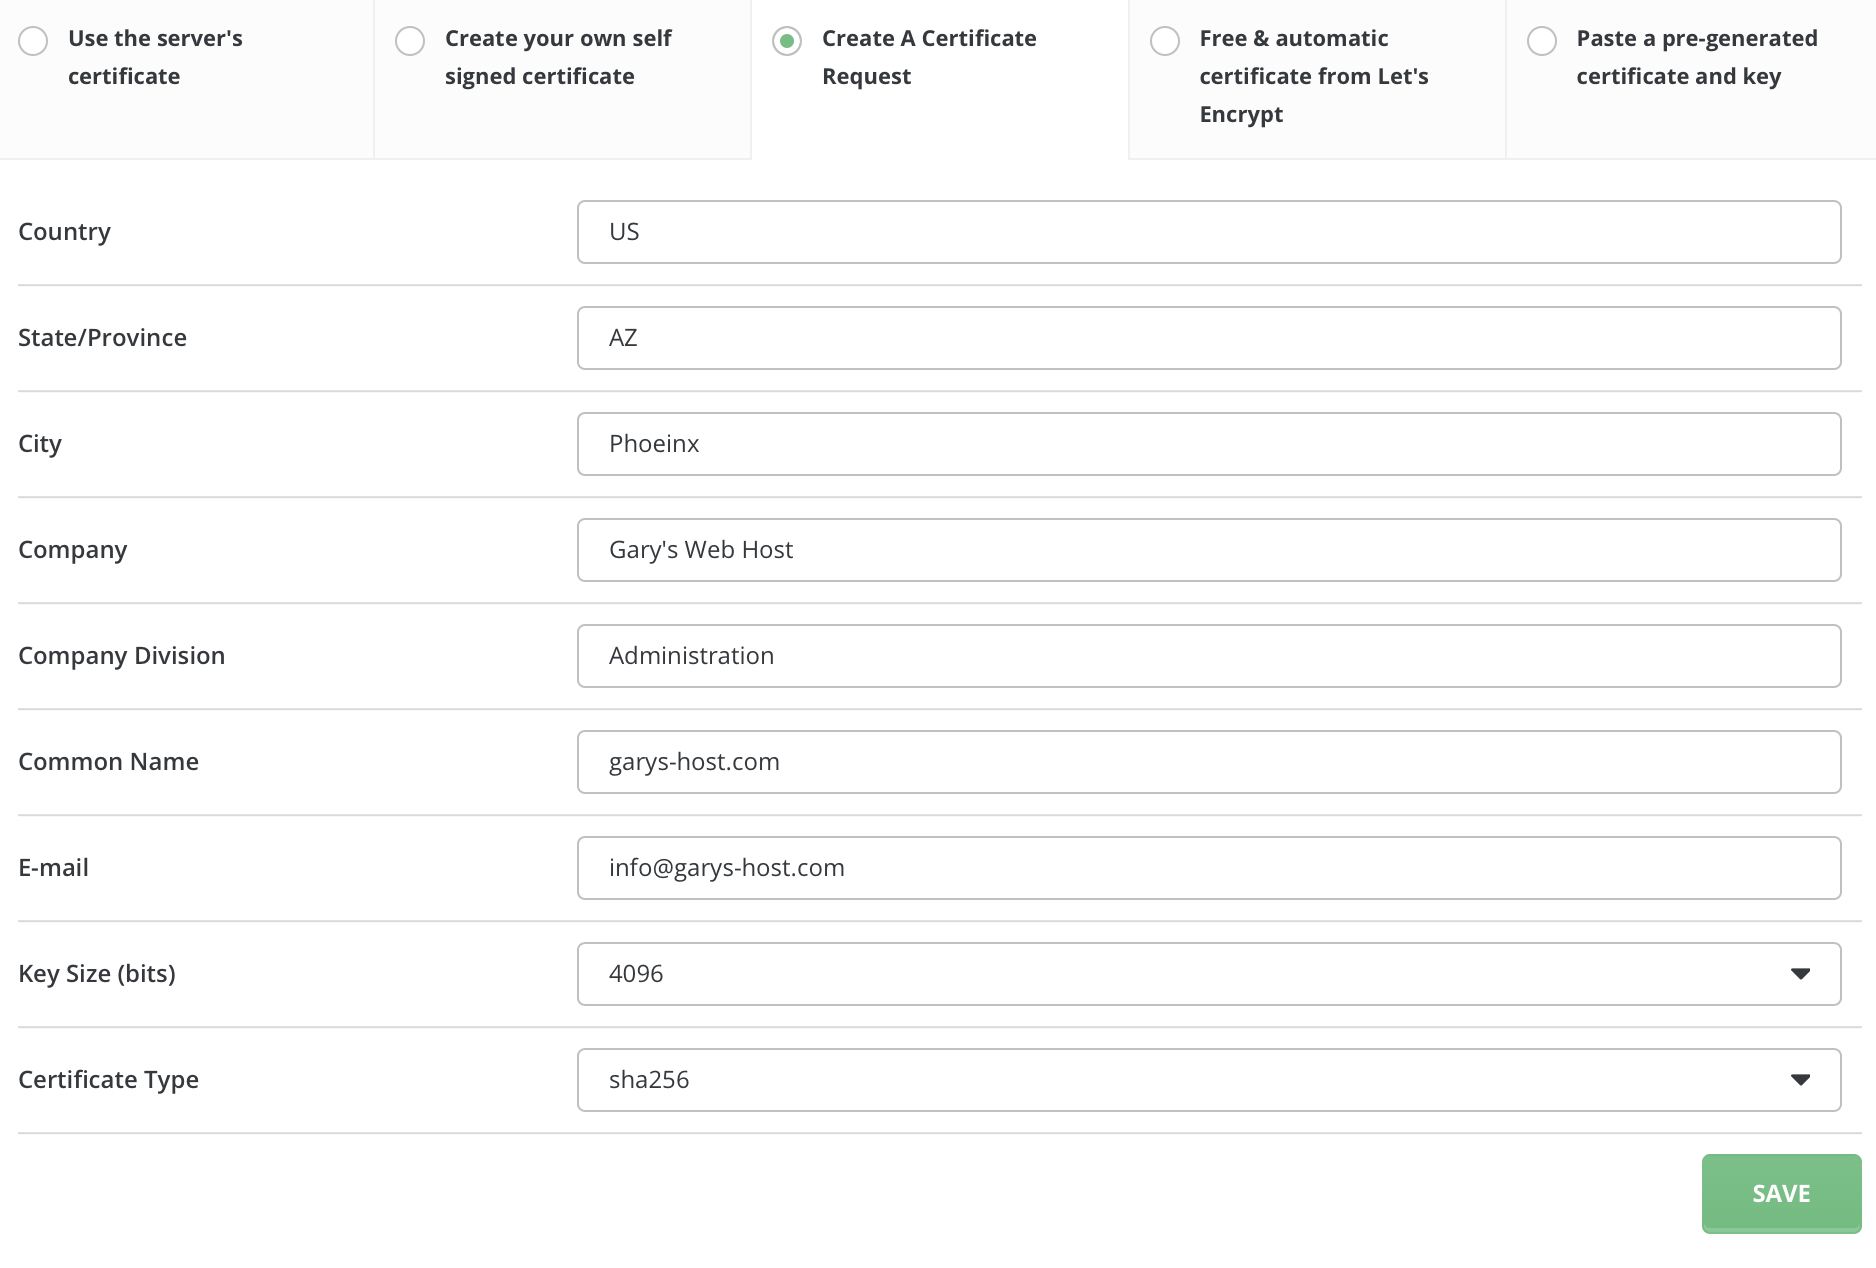
Your site will be secure only at this address. In the above example, https://garys-host.com/anything would be valid, but not https://www.subdomain.garys-host.com.
When you are finished, click the "Save" button at the bottom of the screen. You will then see a page that looks like this:
Copy this text (including the "BEGIN/END CERTIFICATE REQUEST" sections) into a plain text editor such as Windows Notepad and save the file to your hard drive. You will need this CSR when you purchase a certificate.
# Step 2: Purchase a Certificate
When purchasing a certificate, you will be asked about yourself or your company, your web site, and:
- the CSR
- the software that generated the CSR
- your common name
# The CSR
Simply paste the CSR given to you by the control panel, including the "BEGIN/END CERTIFICATE REQUEST" sections. There will be a text box in the order form to paste to. Please ensure the CSR is saved and pasted as plain text.
# Software that Generated the CSR
Choose Apache-ModSSL("OpenSSL"), or "Other" if you don't see Apache-ModSSL in the list. Do not worry about making a mistake, as this information is collected for statistics purposes only.
# Your Common Name
The "Common Name" refers to the address of your site that will go on the SSL certificate (see Step 1). Enter this address without the "http://" unless otherwise specified by the certificate seller.
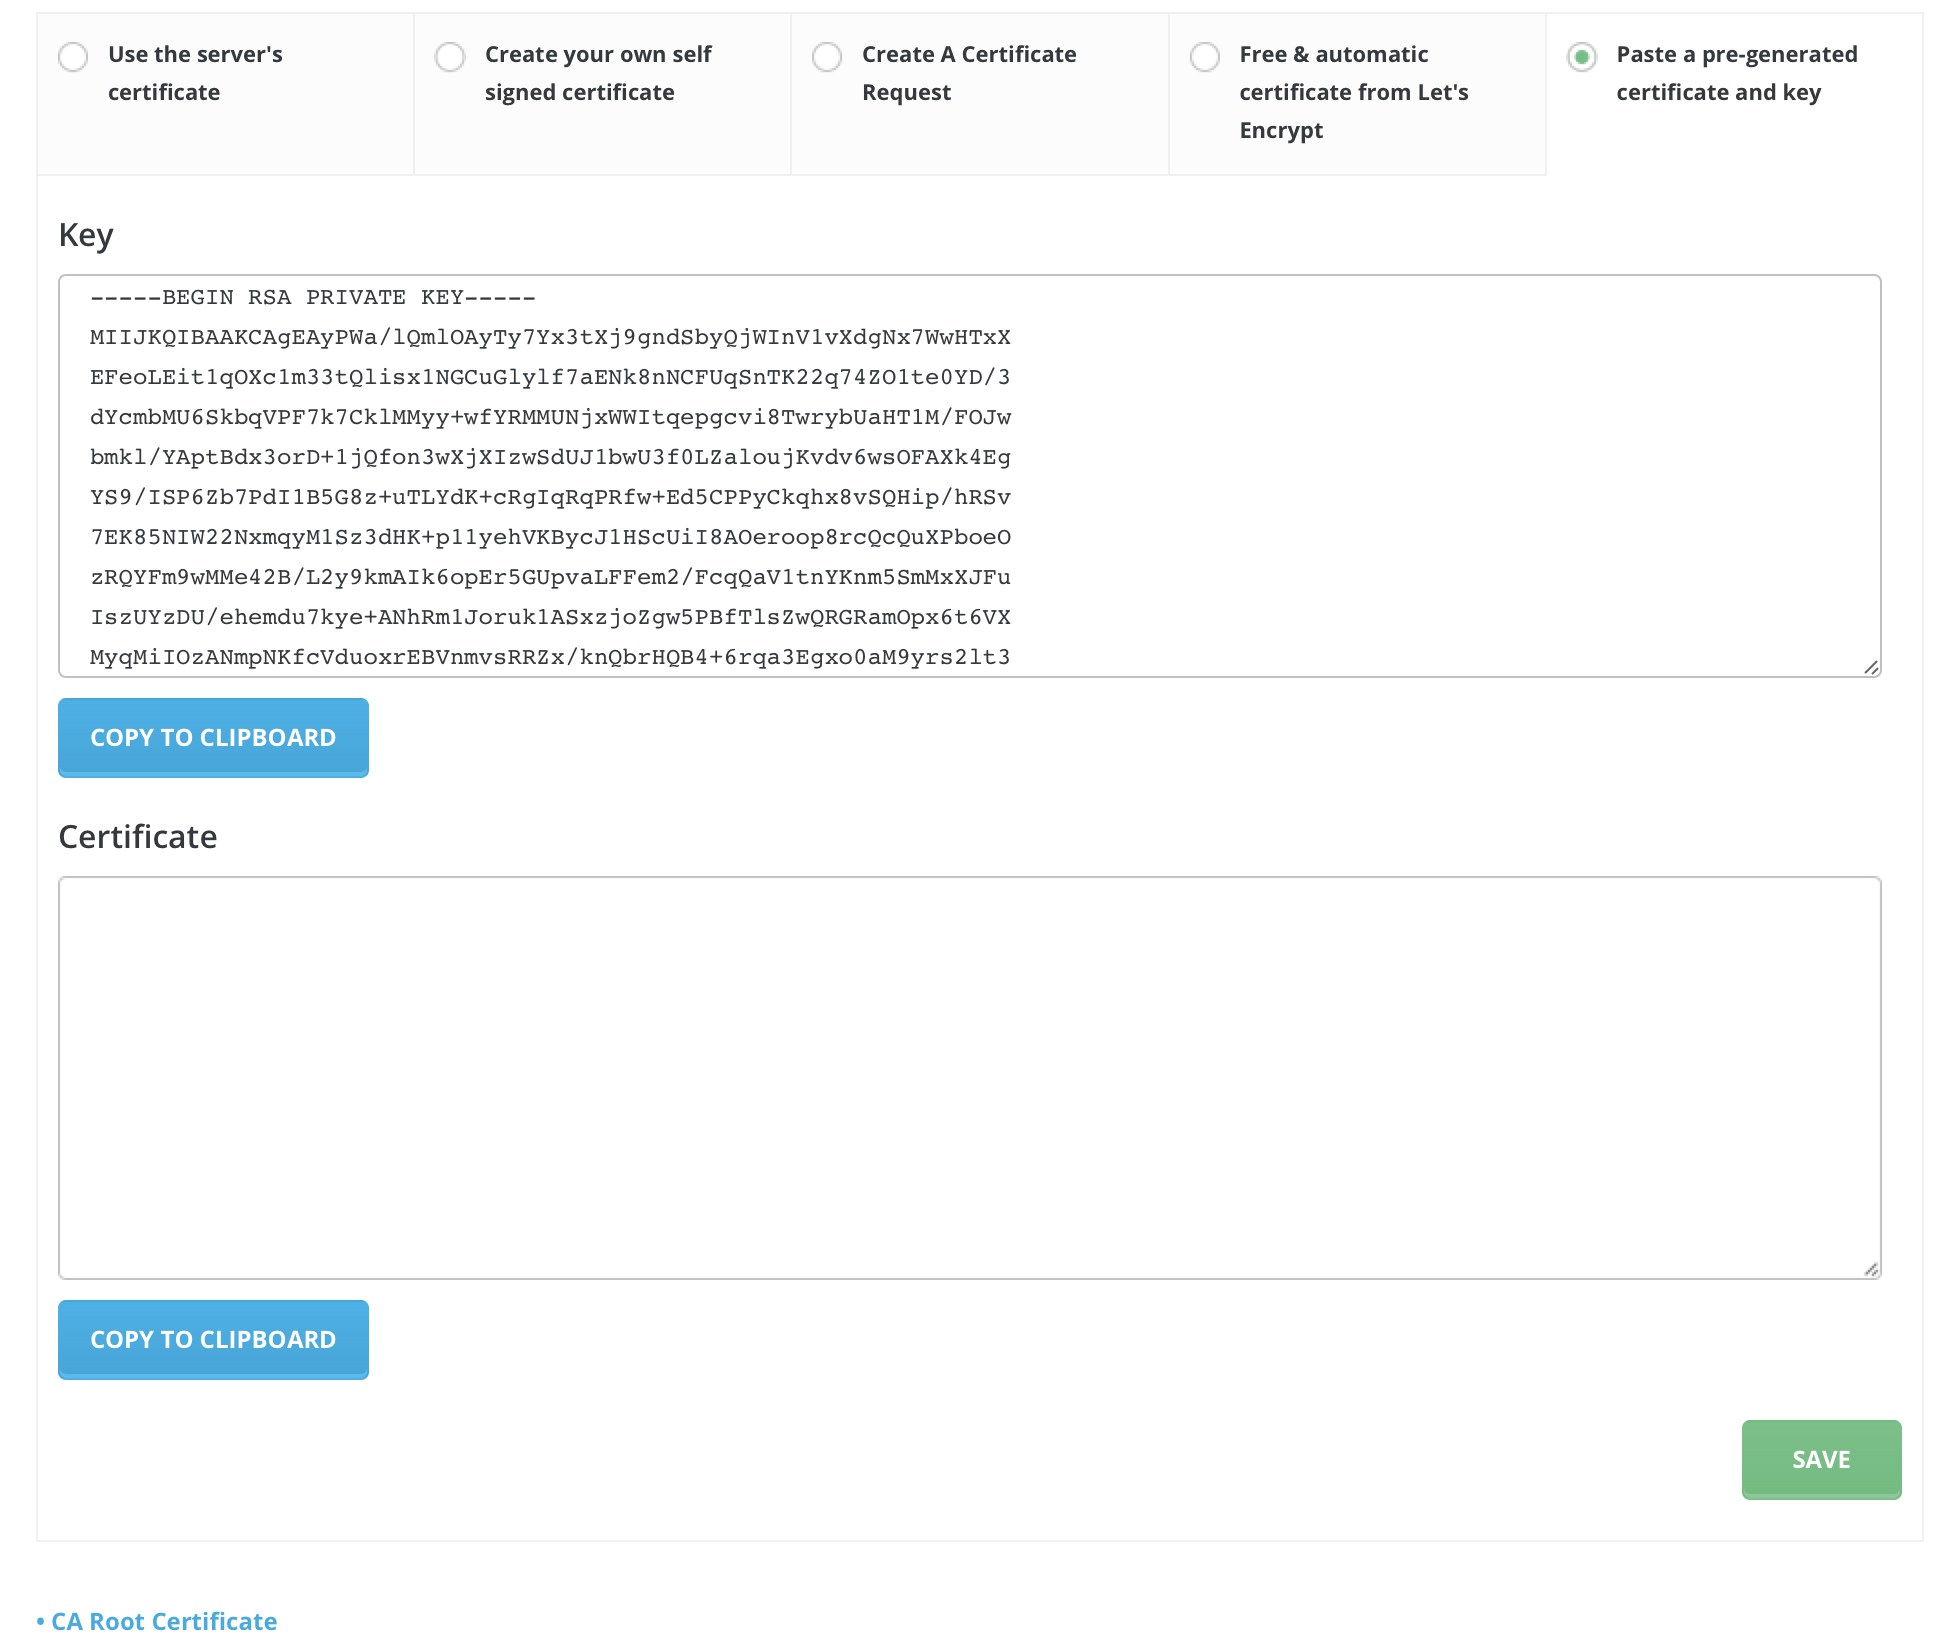
# Step 3: Install a Certificate
Select the radio button next to "Paste a pre-generated certificate and key."
As you can see, the key is already inserted in the text box for you.
Paste the certificate immediately in "Certificate" box below it and click "Save."
The domain's certificate might be named domain.com.crt
# Step 4: Install the CA Root Certificate
In picure above you can see "CA Root Certificate" link. Click on the link and paste your CA Root Certificate in the textbox. Also, click "Use a CA Cert" box above. Then, click the "Save" button.
Important: Remember to check the "Use a CA Cert." box.
Although the installation of a CA Root Certificate is not always required, you may find that your SSL certificate will not function properly without completion of this step.
The CA Certificate may sometimes be call the gd_bundle.crt, ca_bundle.crt, ca_cert, etc..
Note: Do not forget to setup private_html as explained here.
# Using the Server's Shared Certificate
One of the simplest ways to have a secure site is to use the server's built-in self-generated certificate.
Make sure the radio button next the "User the server's certificate" is selected, and click the "Save" button at the bottom of the screen.

# Understanding non-Trusted Certificates
Warning: Although non-Trusted certificates provide a high level of encryption, they are not always the best choice because they are self-generated instead of purchased from a trusted authority.
Because of this, visitors to your site may receive a warning popup window when they access a secure page. Therefore, we DO NOT recommend using this method.
# Creating a Self-Signed Certificate
An alternative to the self-generated shared server certificate is a personalized self-signed certificate.
Step 1: Click the radio buttons to select "Create your own self signed certificate."
Step 2: Enter the information about yourself and your company.
A list of country codes is available here.open in new window
Step 3: Click the "Save" button at the bottom of the screen.
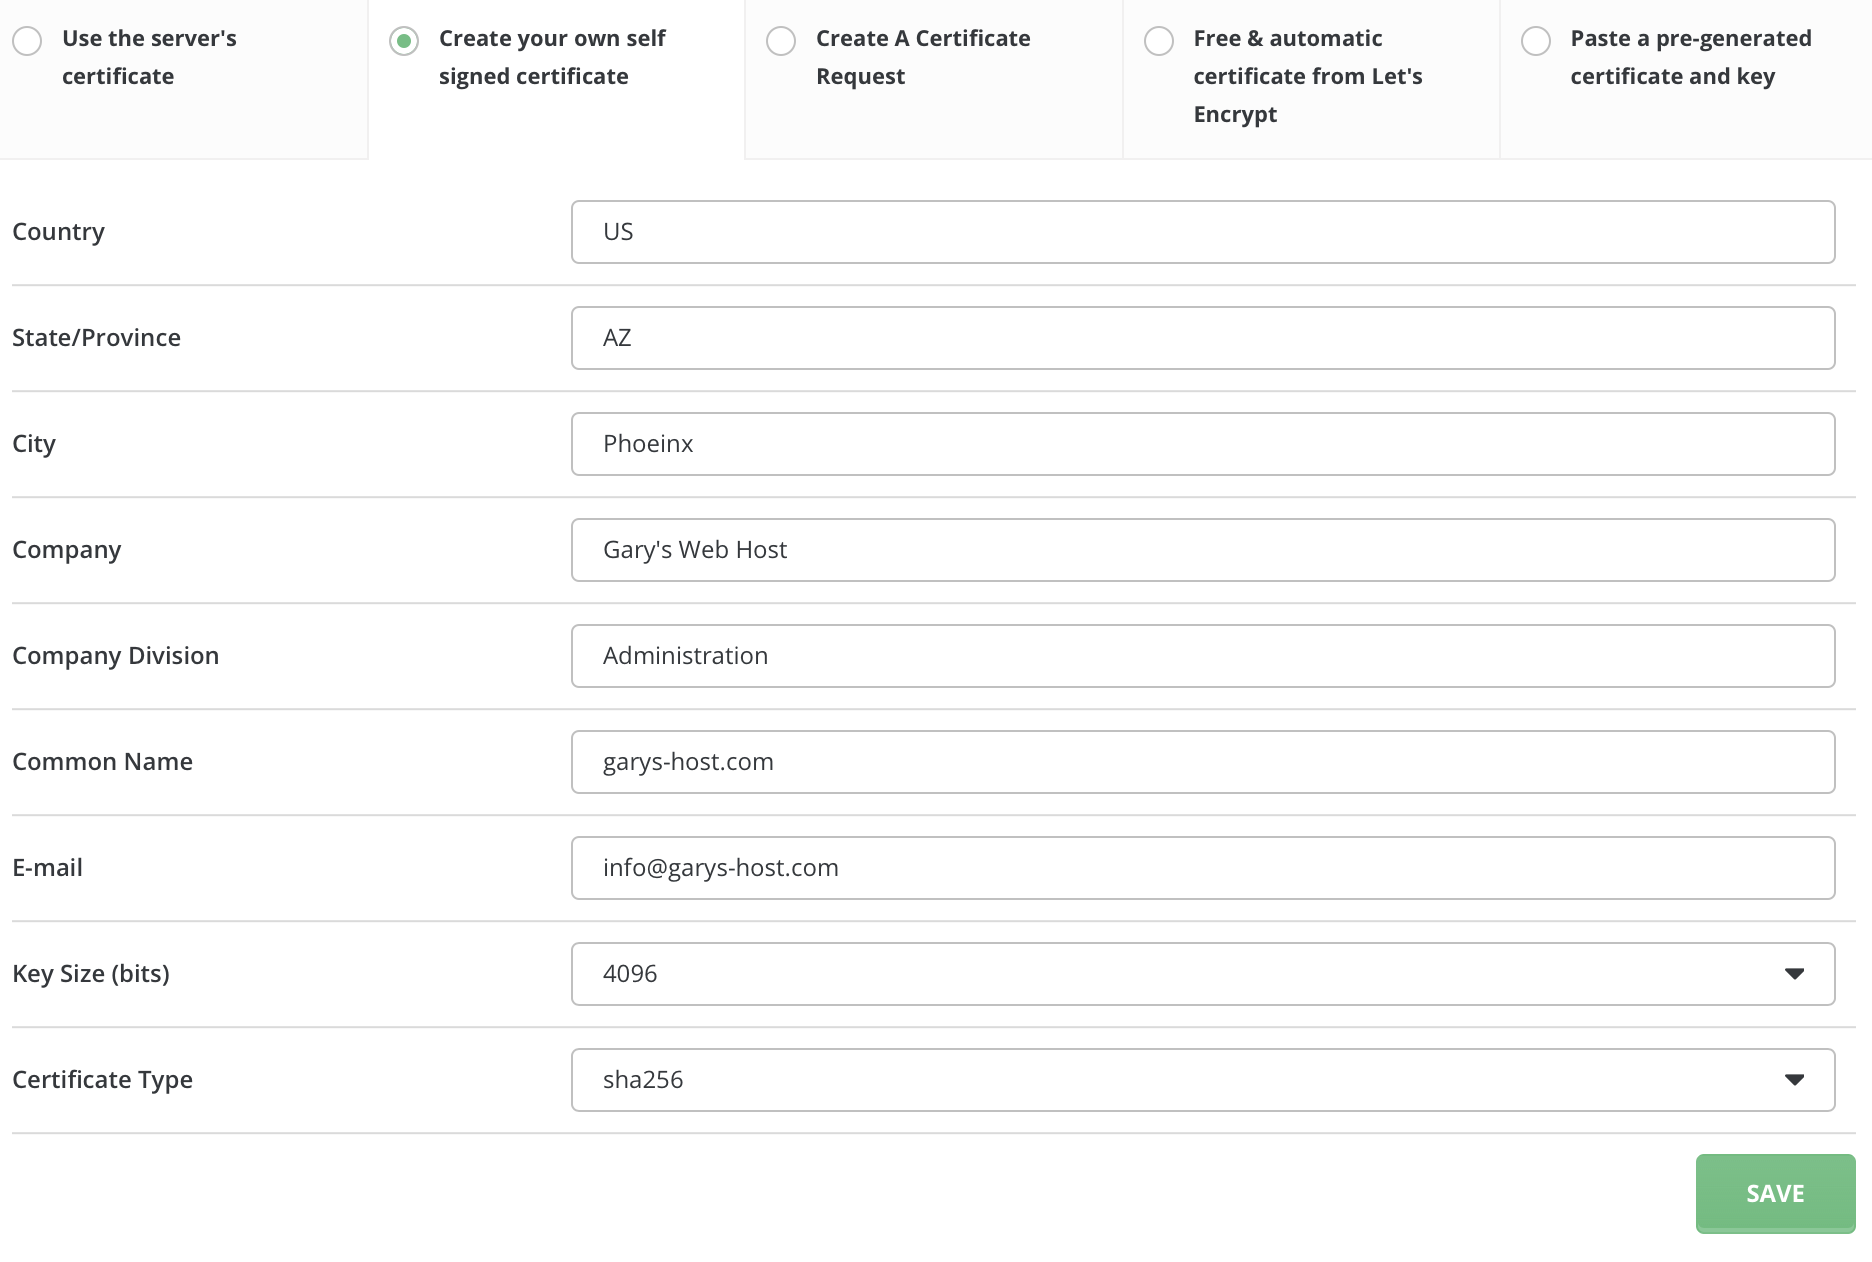
The Common Name is the exact web address the certificate is associated with. In the above example, https://garys-host.com/anything would be valid, but not https://www.subdomain.garys-host.com.
# Understanding non-Trusted Certificates
Warning: Although non-Trusted certificates provide a high level of encryption, they are not always the best choice because they are self-generated instead of purchased from a trusted authority.
Because of this, visitors to your site may receive a warning popup window when they access a secure page. Therefore, we DO NOT recommend using this method.
# Uploading Files to your Secure Site
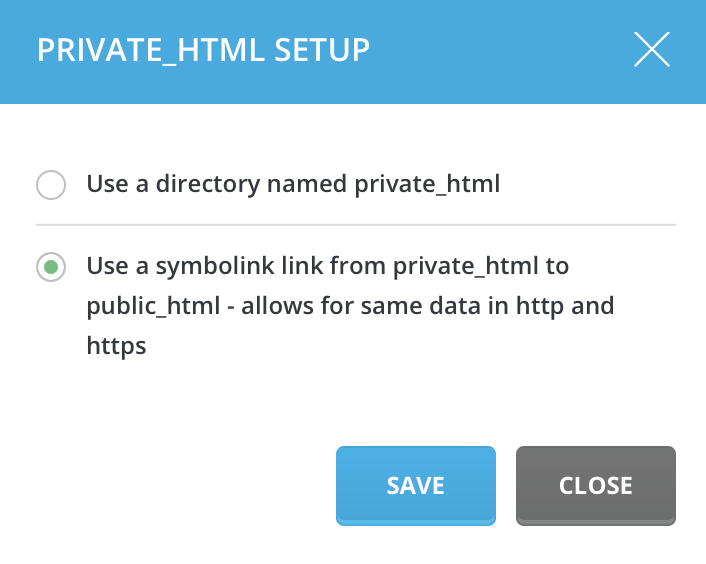
All secure files need to be uploaded to the /domains/domain.com/private_html directory. Easiest way to do this is to link private_html to public_html. To do that go to "Account Manager" icon in Control Panel and choose "Domain Setup" link (You can see pictures of path in page begin). Press  link at the botton of page. Select "use symbolink link" radio and press "Save."
# Force SSL
This feature is part of "Pro Pack".
To enable "Force SSL" sign into the control panel and go into user access level. Then click on the "Account Manager" icon, followed by "Domain Setup".

Once you've done that, click on your domain

and check "Force SSL with https redirect"
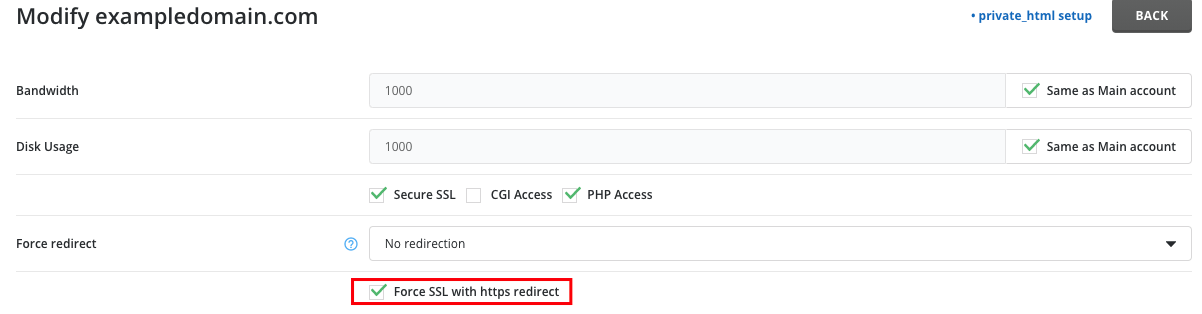
This will allow for domain/subdomains to automatically redirect to the same host and request, but with https.
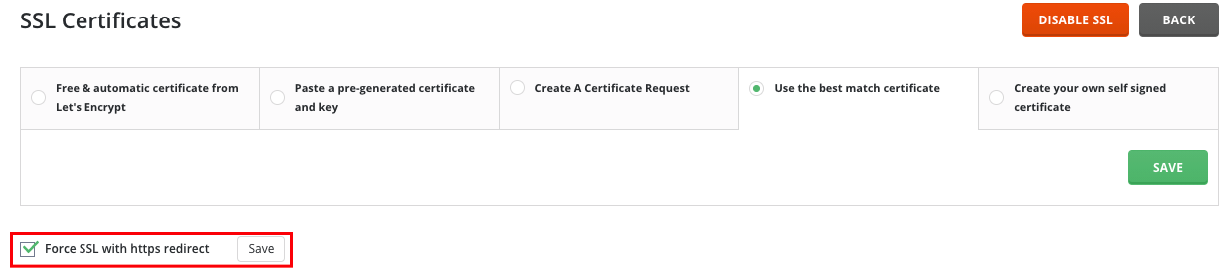
If you wish to enable this setting globally go to Account manager -> SSL Certificates.
Then check "Force SSL with https redirect" and click save.
# Need more help?
Please contact your hosting company for more assistance, or visit the DirectAdmin support forum at http://forum.directadmin.comopen in new window.
